RAM-loadable Linux on a stick

I wanted to play some SNES games with a friend on one of a dozen public windows boxes, but I didn’t want to start downloading ROMs and installing zsnes on them. The simple solution was to just make a bootable USB memory stick with Ubuntu and boot from that on whichever box was available at the time.

The boxes turned out to have more horsepower than I assumed, and conveniently came with Linux-friendly Intel GPUs, so I wanted to try out OpenArena. Of course, then you need multiple windows boxes, and I just had one memory stick. Time to make it load and run entirely from memory, so the memory stick can be unplugged and used to boot other boxes.

Thanks to the fantastic initramfs mechanism, the best Linux feature since UUID partition selection (initrd wasn’t nearly as sweet), this is very easy to do, even when the distro doesn’t support it. Here are some hints on how to do it:

  1. Install on a memory stick. These days, you can conveniently do this in a VM and still expect it to boot on a PC: kvm -hda /dev/sdb -cdrom somedistro.iso -boot d -m 2200 -net nic -net user -k en-us. A minimal install is preferable, loading GNOME from a slow memory stick just to cover it with OpenArena is a waste.
  2. Ubuntu installs GRUB with UUID partitions, but Debian does not, so in that case you have to update menu.list: replace root=/dev/hda1 with root=UUID=<uuid from tune2fs -l here>
  3. Debian has a fancy system for adding initramfs hooks (see /etc/initramfs-tools) that will survive kernel upgrades, but for generality (and not lazyness at all, no siree), we’ll do it the hacked up manual way: Make a new directory and unpack the initramfs: gzip -d < /boot/initrd.img-2.6.26-2-686 | cpio -i
  4. vim init. Find the place where the root fs has just been mounted, and add some code to mount --move it, mount a tmpfs big enough to hold all the files, copy all the files from the real root and then unmount it:

    echo "Press a key to not load to RAM"
    if ! read -t 3 -n 1 k
    then
        realroot=/tmp/realroot
    
        mkdir "$realroot"
        mount --move "$rootmnt" "$realroot"
        mount -t tmpfs -o size=90% none "$rootmnt"
        echo
        echo "Copying files, wait..."
        cp -a "$realroot"/* "$rootmnt"
        umount "$realroot"
        echo "Done"
    fi
    

    Exercises for the reader: Add a progress meter to make the 1-2 minute load time more bearable.

  5. Pack the initramfs back up: find . | cpio -o -H newc | gzip -9 > /boot/initrd.img-2.6.26-2-686
  6. Boot (still in the VM, if you want) and hit a key when prompted so you're running straight from the stick, install all the packages you want, and configure them the way you want them. In my case, I made the stick boot straight into X, running fluxbox and iDesk to make a big shiny Exit icon that would reboot the box (returning it to Windows), just in case any laymen wandered in on it.
  7. Very important: apt-get clean. I had 500MB of cached packages the first time around, which is half a gig of lost memory and an additional minute of load time.
  8. Try booting it from RAM. Make sure you remember if you're running in RAM or not when configuring, or all changes will be lost.

Debian required some kludges in the checkroot.sh init script to make it not die when the root fs wasn't on disk and thus failed to check, but Ubuntu was very smooth about it. Still, no big deal.

In the end, I had a 1000MB installation that could easily turn a dull park of windows web browsing boxes into a LAN party with no headaches for the administrator. Game on.

Pattern matching with Bash (not grep)

Pattern matching, either on file names or variable contents, is something Bash can do faster and more accurately by itself than with grep. This post tersely describes some cases where bash’s own pattern matching can help, by being faster, easier or better.

Simple substring search on variables

# Check if a variable contains 'foo'. Just to warm up.

# Works
if echo "$var" | grep -q foo
if [[ "$(echo $var | grep foo))" == "" ]]

# Easier and faster 
if [[ $var == *foo* ]] 

The latter runs several hundred times faster by saving two forks (good to know when looping), and the code is cleaner and clearer.

Mixed pattern/fixed string search on variables

This is a less common but more interesting case.

#Check if /usr/bin overrides our install dir

# Mostly works (Can fail if $installdir contains 
# regex characters like . * [ ] etc)
if echo "$PATH" | grep -q "/usr/bin:.*:$installdir"

# Quoted strings will not be interpreted as globs
if [[ $PATH == */usr/bin:*:"$installdir" ]] 

We want parts of our input to be interpreted as regex, and parts to be literal, so neither grep nor fgrep entirely fits. Manually trying to escape regex chars is icky at best. We end up chancing that people won’t use the script anywhere near weirdly named files (like, in their torrent directory). With globs, bash doesn’t have to reparse the variable contents as part of the pattern, and just knows to take quoted strings literally.

Of course, you see how both the above fails to account for cases like /usr/bin:$installdir. This is not something you can easily express in traditional globs, but bash does regex too, and the semantics of quotes remain the same (since 3.2 or so at least):

# Quoted strings will not be interpreted as regex either
if [[ $PATH =~ (^|.*:)/usr/bin(:|:.*:)"$dir"(:.*|$) ]]

Matching file names

I’ll skip the trivial examples for things like `ls | grep .avi$`. Here is a case where traditional globs don’t cut it:

# Copy non-BBC .avi files, and fail on half a dozen different cases
cp $(ls *.avi | grep -v BBC) /stuff

Bash has another form of regular expressions, extglobs (enable with shopt -s extglob). These are mathematically regular, but don’t follow the typical unix regex syntax:

 
# Copy non-BBC .avi files without making a mess 
# when files have spaces or other weird characters
cp !(*BBC*).avi /stuff

man bash contains enough on extglob, so I’d just like to point out one thing. grep -v foo can be replaced by !(foo), which strives to reject “foo” (unlike [^f][^o][^o] and similar attempts which strive to accept). egrep "foo|bar" can be replaced by @(foo|bar) to match one of the patterns. But how about grep foo | grep bar to match both?

That’s our old friend De Morgan: !(@(!(foo)|!(bar))). Don’t you just love that guy?

PS: If you don’t already use parameter expansion to do simple trimming and replacement on variables, now could be a good time to look up that and probably save yourself a lot of sed too.

Project: Screenshot diary

So to try something new, I’ll write about a little scripting project you can try for laughs and learning. If you find this too basic, you can browse the “Advanced Linux-related things” category (and there’s an RSS feed for just those posts as well).

Now, if you know that someone is taking your picture, you try to smile and look natural (but invariably fail, with a strained smile and rigid pose as if you were caught grave robbing). The equivalent in screenshots is to either close all your apps (if you like your background image) or run a bunch of random ones (if you don’t), and then opening the program menu two or three levels. Judging from most screenshots you see, people are constantly contemplating which of their many lovely apps to run next:
Screenshot just as described Screenshot just as described Screenshot just as described

How about this for an idea: Take a new screenshot at random intervals while you actually use the desktop.

Not only do you always have a natural looking screenshot if anyone should ask, but you get basically a little timelapse of your activity. I set up such a system in 2004, and it’s more fun than it should be to flip through them all!

To do this, we’ll make a script and stick it in the crontab. Since cron can only run things at fixed intervals, we’ll use short intervals and make the script randomly choose if it should take a screenshot or not. When it does, it’ll put it with a timestamp into some directory.

Open ~/bin/takeshot. First the shebang, and in 99 out of 100 cases, we’ll just exit:

#!/bin/bash 

if (( RANDOM % 100 ))   
then
	exit 0
fi

Let’s define a good place for our screenshots:

directory=~/screenshots

Since the crontab runs independently of our X11 session, we have to specify which display to use. :0 is the first display, which on a single user box is probably the only one:

export DISPLAY=:0

While the screensavers are very nice, I don’t really want screenshots of them. Xscreensaver comes with a tool that can be used to check if the screen is currently blanked. For simplicity we use the short-hand && notation rather than a full if statement:

xscreensaver-command -cycle 2>&1 | grep -q 'cycling' && exit 0

This only works for xscreensaver, not for other screen saver packages such as xlock or the KDE screensavers. Feel free to skip.

Now let’s create the output directory if it doesn’t exist, and define the filename to use:

mkdir -p "$directory"
output="${directory}/shot$(date +%Y%m%d%H%M%S).png"

This gives us a filename with the current date and time, such as ~/screenshots/shot20090314232310.png.

Now to actually take the screenshot. There are tons of utilities for this, but the two main ones are ‘import’ from ImageMagick; and xwd (from X.org) plus NetPBM to convert it. Import is simpler to use, but I’m a fan of NetPBM for its modularity. Plus NetPBM produces png files that are half the size of ImageMagick’s. Here are both ways:

# Using ImageMagick 
import -win root "$output"
## NetPBM Alternative: 
# xwd -root | anytopnm | pnmtopng > "$output"

Now chmod +x ~/bin/takeshot and try running it a few times (you might want to temporarily delete the zeroes in “100” to speed things up). Check that the screenshots are there.

Now add it to cron. Run crontab -e and add

*/10 * * * * ~/bin/takeshot &> /dev/null

Save and exit whichever editor crontab -e invoked for you.

The script should now be taking a screenshot on average every 100*10 minutes, or 17 hours of actual use time. You can adjust either factor up and down (or make an even more clever scheme) to get more or less screenshots.

To summarise the script:

#!/bin/bash 

if (( RANDOM % 100 ))   
then
	exit 0
fi
directory=~/screenshots
export DISPLAY=:0

xscreensaver-command -cycle 2>&1 | grep -q 'cycling' && exit 0

mkdir -p "$directory"
output="${directory}/shot$(date +%Y%m%d%H%M%S).png"

# Using ImageMagick 
import -win root "$output"
## NetPBM Alternative: 
# xwd -root | anytopnm | pnmtopng > "$output"

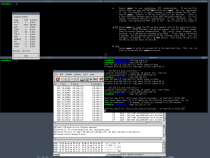
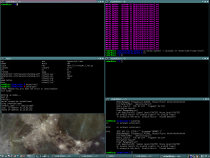
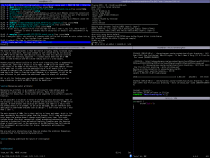
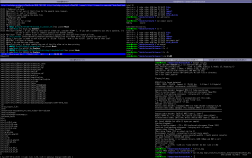
Here are some random screenshots of mine from different years and wms:

Bunch of terminals in Fluxbox Bunch of terminals in KDE Bunch of terminals in Ion3 Bunch of terminals in Ion3, now widescreen

Multithreading for performance in shell scripts

Now that everyone and their grandmother have at least two cores, you can double the efficiency by distributing the workload. However, multithreading support in pure shell scripts is terrible, even though you often do things that can take a while, like encoding a bunch of chip tunes to ogg vorbis:

mkdir ogg
for file in *.mod
do
	xmp -d wav -o - "$file" | oggenc -q 3 -o "ogg/$file.ogg"
done

This is exactly the kind of operation that is conceptually trivial to parallelize, but not obvious to implement in a shell script. Sure, you could run them all in the background and wait for them, but that will give you a load average equal to the number of files. Not fun when there are hundreds of files.

You can run two (or however many) in the background, wait and then start two more, but that’ll give terrible performance when the jobs aren’t of roughly equal length, since at the end, the longest running job will be blocking the other eager cores.

Instead of listing ways that won’t work, I’ll get to the point: GNU (and FreeBSD) xargs has a -P for specifying the number of jobs to run in parallel!

Let’s rewrite that conversion loop to parallelize

mod2ogg() { 
	for arg; do xmp -d wav -o - "$arg" | oggenc -q 3 -o "ogg/$arg.ogg" -; done
}
export -f mod2ogg
find . -name '*.mod' -print0 | xargs -0 -n 1 -P 2 bash -c 'mod2ogg "$@"' -- 

And if we already had a mod2ogg script, similar to the function just defined, it would have been simpler:

find . -name '*.mod' -print0 | xargs -0 -n 1 -P 2 mod2ogg

Voila. Twice as fast, and you can just increase the -P with fancier hardware.

I also added -n 1 to xargs here, to ensure an even distribution of work. If the work units are so small that executing the command starts becoming a sizable portion of it, you can increase it to make xargs run mod2ogg with more files at a time (which is why it’s a loop in the example).